Bond and Validate
Your node is synced and its session keys exist (see Run a Validator Node). This page turns your validator account into a candidate: it bonds its self-stake, registers the session keys and offers to validate. You can do it from the app or with extrinsics; the result is the same.
- Your validator account holds at least the minimum self-bond — 1,000 ORB on testnet — plus a little for fees.
- On the testnet admission is permissioned: your account must be on the allowlist.
Governance adds it with
validatorSet.addValidator, which requires your session keys to be registered first.
Option A — the app
Open the app, go to Staking → Validator, and connect your validator account with Talisman or SubWallet. The page is a guide with three steps. Each step says what it is for; the one still pending is open, finished steps show a summary you can Review, and steps that need an earlier one are locked.
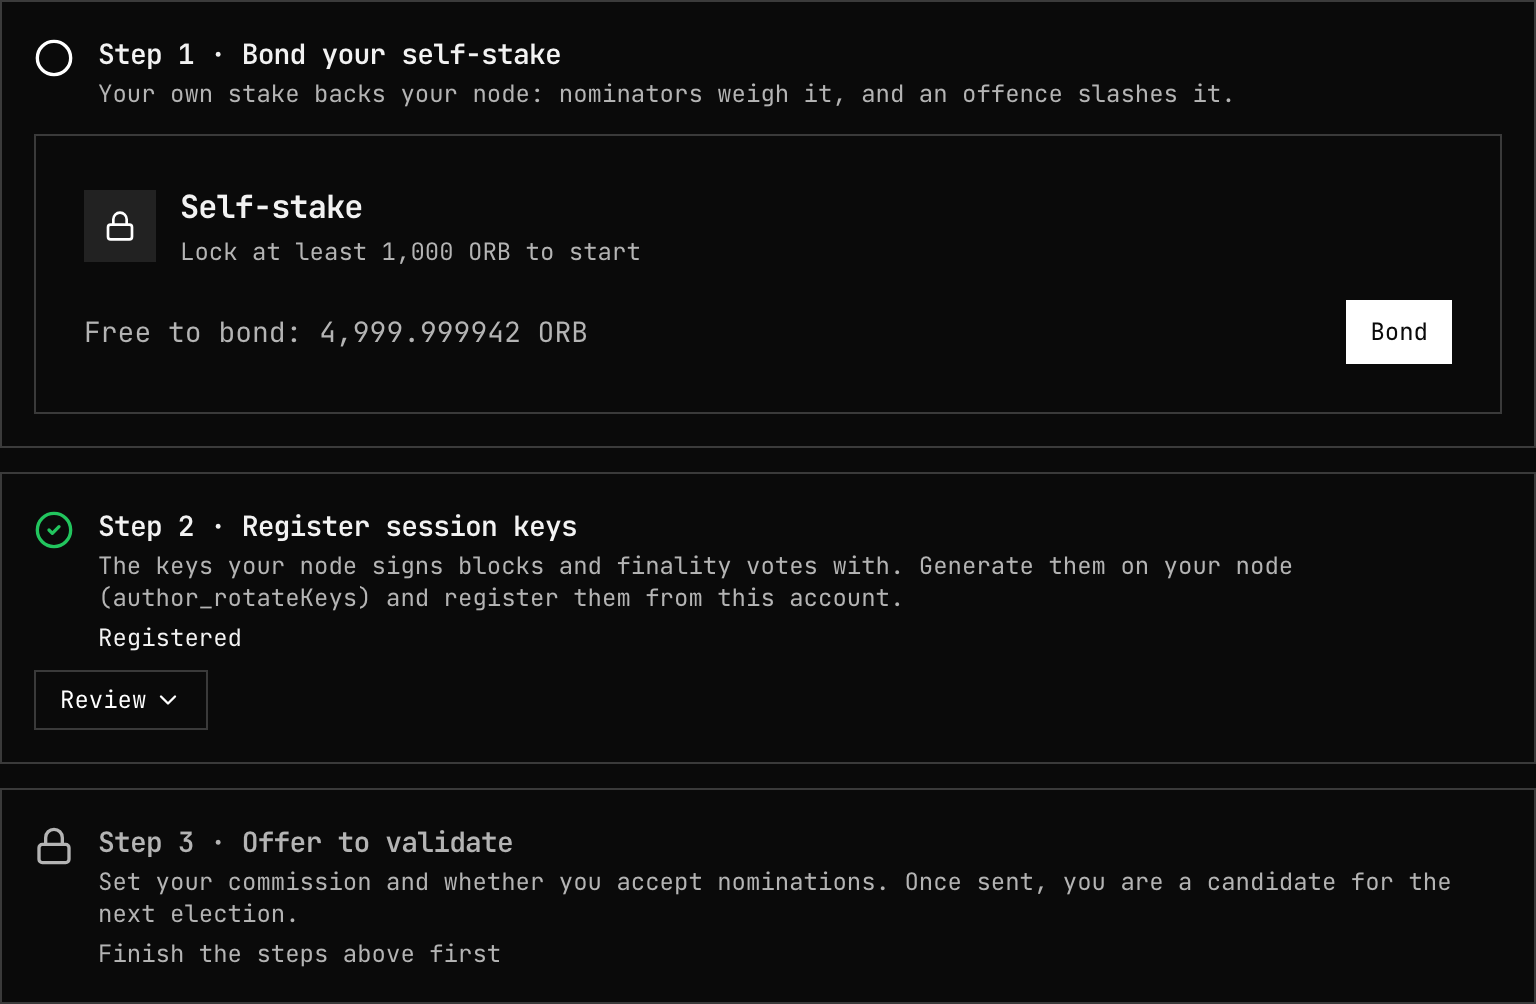
1. Bond your self-stake
Enter the amount — at least the minimum shown — and press Bond. Rewards default to Compound (added to your bond); you can change the destination later in Settings.
Bond a little less than your whole balance: bonded ORB cannot pay fees, and the next two steps each cost one.
2. Register session keys
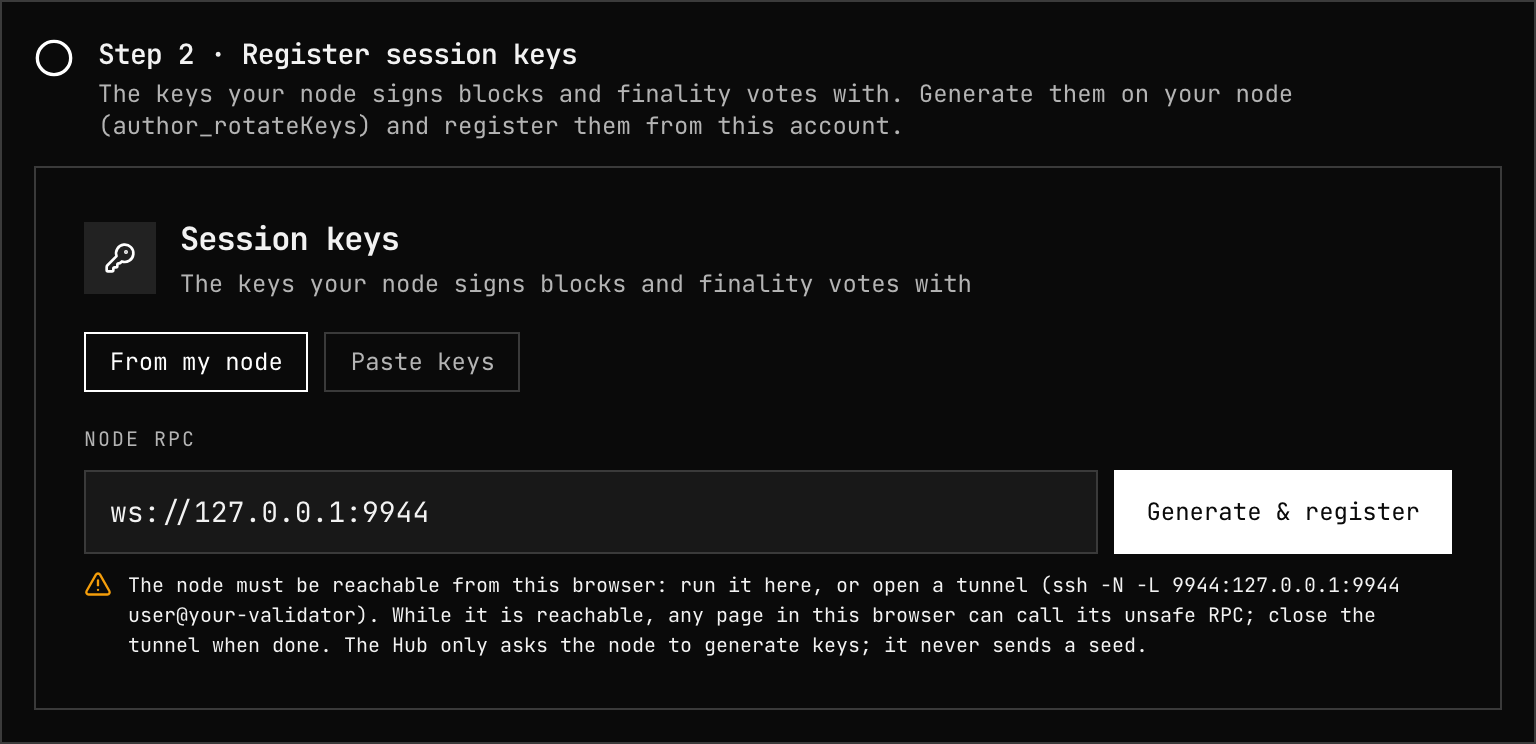
- From my node — enter your node's RPC address (default
ws://127.0.0.1:9944) and press Generate & register: the app asks the node for fresh keys and their proof (author_rotateKeysWithOwner) and registers them. Your browser must reach the node — run it locally or open an SSH tunnel (ssh -L 9944:127.0.0.1:9944 your-server); the validator's RPC is never exposed to the internet. - Paste keys — paste the
keysandproofyour node returned in Generate session keys, then register.
If your keys are already registered — the usual case on the testnet, where
addValidator requires them — this step shows Registered.
3. Offer to validate
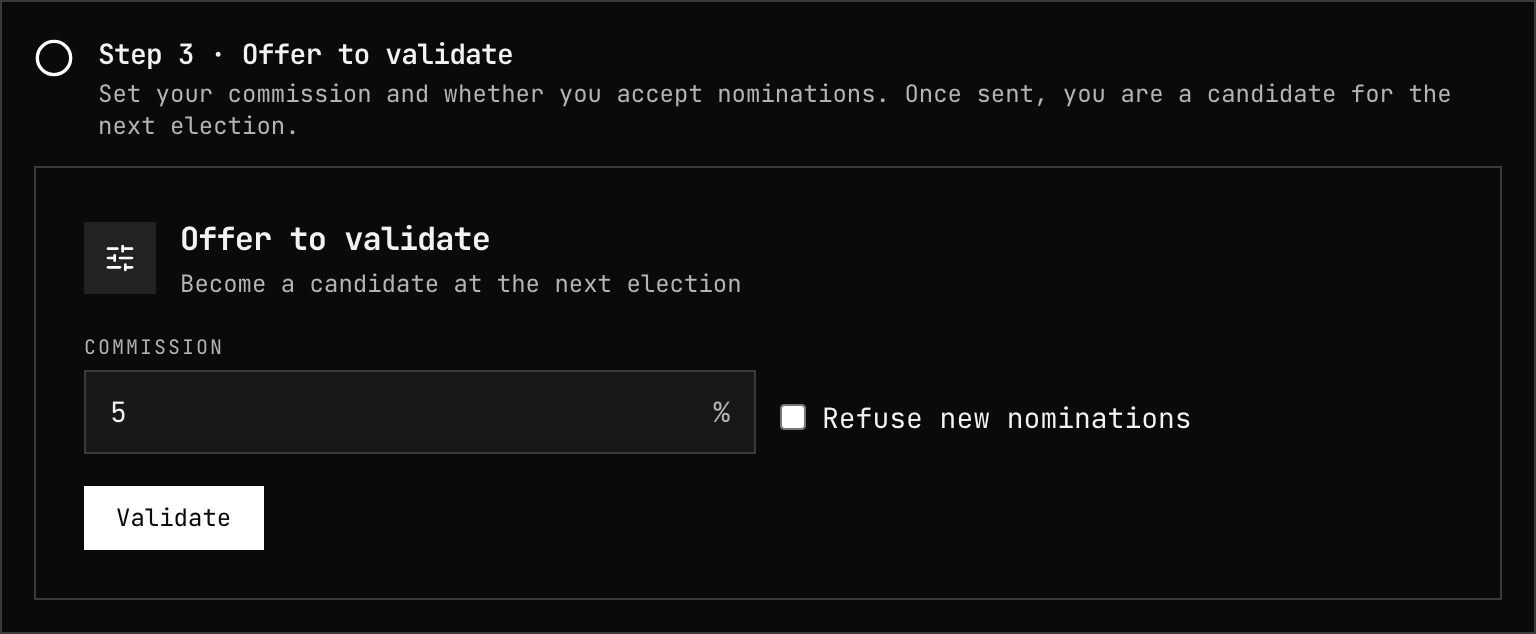
Set your commission — the share of your era reward you keep before the rest is split with your nominators — and whether you accept nominations, then press Validate. The page switches to your validator dashboard.
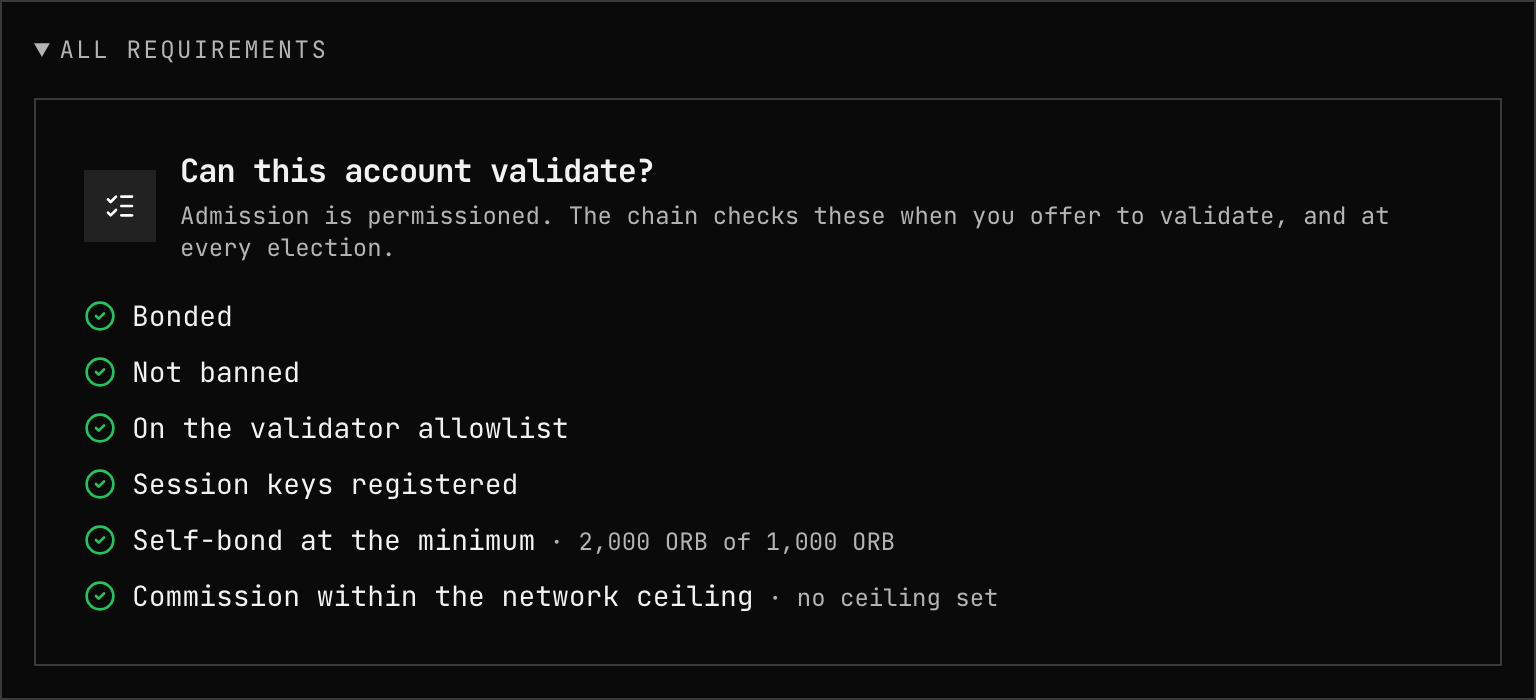
Check the requirements
All requirements, under the steps, lists every condition the chain checks, with how to fix the ones you do not meet yet.
Option B — extrinsics
In Polkadot.js Apps connected to
wss://rpc-1.testnet.orbinum.io, open Developer → Extrinsics and sign each call with
your validator account.
- Bond.
staking.bond(value, payee)—valueat leaststaking.minValidatorBond,payee=Stakedto compound. - Session keys.
session.setKeys(keys, proof), if they are not registered yet — see Submitsession.setKeys. - Validate.
staking.validate(prefs)withprefs = { commission, blocked: false }.
commission is a Perbill: 5 % is 50000000, 10 % is 100000000. Entering 5 sets
0.0000005 %.
Rejections
A validate that could not count is rejected before it costs a fee, with
InvalidTransaction::Custom(code):
| Code | Meaning | Fix |
|---|---|---|
| 1 | Not on the allowlist (permissioned admission) | Ask governance to add the account |
| 2 | Banned | Wait for the ban to end, or for governance to lift it |
| 3 | No session keys | session.setKeys |
| 4 | Self-bond below the minimum | staking.bondExtra |
| 5 | Commission above the network ceiling | Lower it (only if governance set staking.maxCommission) |
| 6 | Not bonded | staking.bond first |
| 7 | 256 candidates already standing | Wait until one stops |
| 8 | Session keys in use | Applies to session.setKeys / purgeKeys while you are in the current or queued set — see Rotate session keys |
Confirm you are a candidate
- The app's Staking → Validator page shows your dashboard with status Waiting and You are a candidate: the next election can select you.
- In Developer → Chain state,
staking.validators(yourAccount)returns your commission.
Your candidacy counts at the next election, about two hours before the current era ends. If you are elected, you start authoring when the next era begins, and status turns Active. Then see Operate a validator.
Related
- How staking works — admission and the election
- Rewards — what commission applies to
- Operate a validator — after you are elected